
How to make sourdough starter from scratch – With just 2 ingredients, love, warmth, time and luck, you can easily grow your sourdough starter at home!
Tip: If you want to skip all the explanations/ tips and get straight to how to make sourdough starter from scratch, then scroll down to the recipe. However, I would highly recommend you to at least start at “Tips on making a Sourdough starter”.
When it comes to sourdough starter, there seems to be a mix feeling on the internet. Some love it and some hate it. Those who are new to it, are scared of it. However, people who took the courage to make their sourdough starter usually do not regret it.
When we (my husband and I) first wanted to try making our sourdough starter, the first reaction we got was, “It is very difficult. You might not succeed.”. To some point, I agree to that because the most difficult part to a sourdough starter is to grow a sourdough starter. Once the starter is ready, this little baby is easy to maintain. As long as you treat it well, it will stay loyal to you for the many years to come. To be honest, what do we have to lose trying to grow a sourdough starter? Other than some flour, water, time, nerves and energy. There is not much to lose. Eventually, we insisted and went to cultivate our sourdough starter. It was successful, and we even gave it a name at birth !
You might be wondering, why am I making this sourdough starter guide? I mean, there are so many starter guides out there (books and on the internet). Firstly, it is a request from my lovely reader (you know who you are 🙂 ). Secondly, I wanted to create a guide which is easy (you can start immediately without any prior knowledge and google) yet comprehensive (as much information as possible). Lastly, it should budget-friendly. This means that everything you need, you should find them at home. There is no need to buy any special utensils or tools. I know that there are many professional baker tools out there. You can get those if you wish, but I have survived without.
Just a little disclaimer, I am not a professional baker. I am just a simple mum, who likes baking. This blog post is written from my experience and research. We have grown several sourdough starters, and they were all successful. Therefore, I would like to share my experience with you.
What is a sourdough starter?

A sourdough starter is produced through the fermentation of a flour and water mixture, which contains wild yeasts and beneficial bacteria. It is maintained through regular feedings and is used to leaven breads. Other than that, it gives breads a tangy aroma.
Sourdough are breads made using sourdough starter as a leavening agent and not with commercial yeasts. There are many types of sourdough starters made with different types of flours. Different flours have different properties, which affect the amount of water we use and the types of breads we bake.
For simplicity, we will just separate them into liquid and stiff sourdough starters. In this recipe, we will be making liquid rye sourdough. In part II of this guide, I will show you how to make stiff wheat sourdough. Do not worry, we do not need to start everything from the beginning. This is just my preferred consistencies of each sourdough starters, when it comes to baking sourdough breads. Stiff sourdough starters are better for storage purposes and produces a milder bread. However, you can always adjust the taste of the bread. Just feel free to experiment and have fun with your starter and sourdough!
How to use a sourdough starter in sourdough
Using a starter in your sourdough is not much different from using commercial yeast in your breads. One big difference lies in the time for the bread to rise. Sourdough takes about 8 – 24 hours to rise, while yeast breads take about 45 minutes to 1 hour to rise. Also, in my opinion, sourdough breads taste much superior to normal yeast breads.
Warm water, flour, salt, warmth and a leavening agent (an active sourdough starter) is all you need for a good loaf of bread. However, you are not limited to these ingredients. You can spice up your bread with juices, dry fruits, nuts and more!
Sourdough is also a healthier choice of bread in comparison to other types of breads. It is easier for young children and adults to digest this type of bread. Not to mention that there are many other health benefits found within sourdough.
How to obtain a sourdough starter

There are several ways you can get hold of active sourdough starter.
- Friends and family: This is probably the easiest and fastest way to own your sourdough starter. If you know someone who has a starter, you can ask them if they could give some to you. All you require is just 10g of it, and you can give it some refreshment. Make sure that the sourdough starter is active and bubbly.
- Sourdough starter kit: One alternative is to get a commercial sourdough starter kit or sourdough starter. However, do note that these kits can be expensive and the quality might not be good. Other than that, I am not sure, if it makes things easier, since I have not tried it before.
- Do-it-yourself: It is amazing how nature works. With only 2 Ingredients, you can easily grow your own sourdough starter. It is definitely budget-friendlier than buying a starter, and you will be proud of yourself for growing your very first sourdough starter! This is what this whole blog is about. I would highly recommend you check out on the tips below before starting because the guide is different from all my other recipes and growing a sourdough starter does require more attention and care.
Tips on making a sourdough starter
1. Temperature is key
The right temperature is very important for the growth of the sourdough starter and while rising your sourdough bread. The optimal temperature to grow your starter lies between 26 °C and 30 °C. It is crucial to maintain this temperature for the first few days of growth.
In addition, use warm water (about 40 °C) for the whole process, so that it will have an optimal start temperature. Just think of it like your baby or pet, which needs extra warmth. Once your starter is stable and strong enough, they are easy to care for. There are several ways to maintain/retain the warmth:
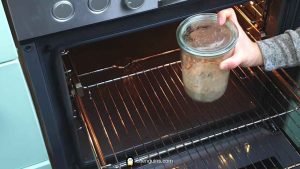
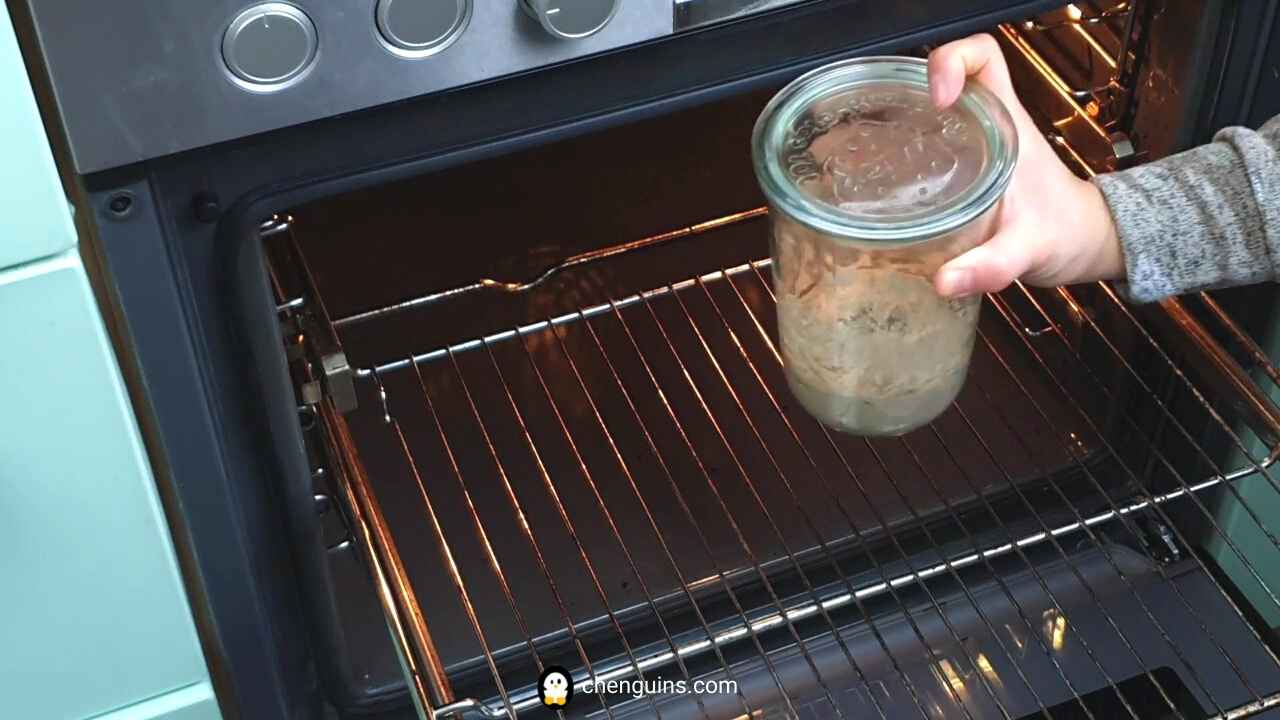
- The best possible way to sustain this temperature is to use your baking oven, if you have one, and if it can continue this temperature for several days. Use a thermometer in this case to help you.
- If your baking oven is occupied, or you require another method, warm water baths could get the job done as well. However, you will have to change the water regularly to maintain the warmth.

- During cold season, what I like to do, is to wrap my jar in a cloth and place it near the heater. The towel retains the warmth of the jar, while the heater provides warmth. This method is more cost-friendly and useful during the cold season.
2. Exact measurement
When it comes to cooking and baking, I am not a person who follows every single rule. Unless I am writing for a recipe post, I usually cook according to my stomach feeling. Since I want to grow something out of nothing, I would definitely follow the 1:1 rule, as the chances of success would be higher. This means using one part of flour to one part of warm water. If you finally see tiny little bubbles after many hours in your starter jar on the first day, trust me, the joy is real.
3. Types of flour
You can basically use any high quality whole grain flour or whole wheat flour for a sourdough starter. It should be high-quality, organic and whole grain. Due to its nature and properties, organic whole grain rye flour is the best choice for growing a sourdough starter because it is packed with nutrients. The chances of your success is higher, if you have access and use this type of flour.
Once the sourdough starter is stable enough, we would not need to use organic whole grain rye flour. “Normal” rye flour will do. Whole grain is nice-to-have, but not a must-have. You can still bake whole grain breads with it.
This guide consists of part I and part II. In part I, we will be using high-quality whole grain dark rye flour for our sourdough. In part II of this guide, I will show you how to switch flour for the sourdough starter. If you do not want to bake sourdough rye breads or want different types of sourdoughs. Then wait for part II.
Do not worry, you do not need to begin from all over again. Part II is a continuation of this post.
4. Time and patience
Another essential factor affecting the growth of a sourdough starter is giving it time and be patience. Once you see it bubbling on the first day, you will know that you are on the right track. However, it may take up to 12 to 24 hours to see this effect. By the end of Day 1, it should double in size. Sourdough and its starter require time to rise and grow. If you are not ready to invest this time, then you are better off with commercial yeast or instant bread. A perfect loaf of bread simply need good ingredients and time to rise.
5. Hygiene
It is important to always start with clean utensils and clean hands to avoid contamination. Clean all bowls, jars and spoons with boiling water. Be careful as it is very hot.
Ingredients and tools for making a sourdough starter

I want to keep this list as simple as possible and as budget-friendly as possible. There are many professional baker tools out there. They are definitely nice-to-have, but not a must-have. All you need are
- Oven gloves
- Kitchen scale
- 2-3 glass jars with wide opening (at least 1x500g and 1x750g), which are heat-resistant. Canning jars are suitable in this case. I always recycle my glass jars from the consumption of apple purée, marmalade or honey. In Germany, these glass jars are often heat-resistant. This means that you can clean them using boiling water without damaging them.
- 2-3 Metal spoons, they should be long enough to reach the bottom of your jars. If you have a silicon spatula, you can use it too.
- 1-2 bowls for your ingredients and to put your spoons.
- For this recipe, you will only need two ingredients (yes, you read it correctly, only 2 ingredients), high-quality whole grain rye flour and warm water.
How to make sourdough starter from scratch
As mentioned, you should always start with clean utensils and clean hands. Clean all bowls, jars and spoons with boiling water. Be careful as it is very hot and use exact measurements. When in doubt, please watch the tutorial below.

Day 1:
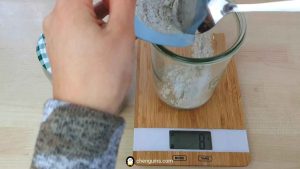
- In a small clean jar, add 50g of organic whole grain rye flour into 50g of warm water.
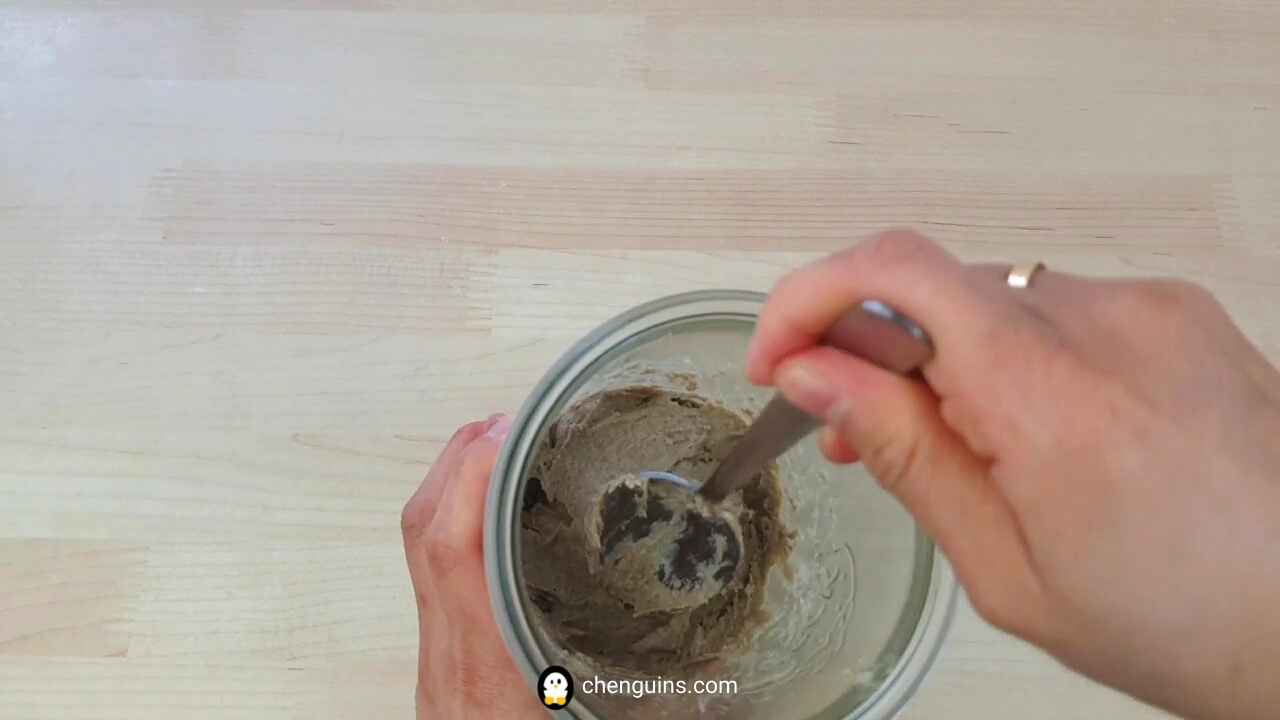
- Mix the ingredients with a clean spoon until you get a smooth texture.
- With the help of a second spoon, smoothen the top of the mixture until you get a flat surface. Mark the height of your mixture with a permanent marker.
- Gently place the lid on the jar, without screwing the lid. Simply cover the mixture with the lid.
- Place the jar in a warm place (between 26 °C and 30 °C) for 24 hours. It is a good sign, if you start seeing tiny bubbles in the starter.
- The height of the sourdough starter should double. In addition, there should be many tiny little bubbles in the starter.
Day 2:
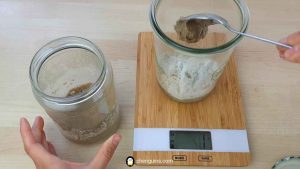
- In a large clean jar, add 50g of whole grain rye flour into 50g of warm water. Thereafter, add all the sourdough starter from Day 1 into the large jar.
- Mix the ingredients with a clean spoon until you get a smooth texture.
- With the help of a second spoon, smoothen the top of the mixture until you get a flat surface. Mark the height of your mixture with a permanent marker.
- Gently place the lid on the jar, without screwing the lid. Simply cover the mixture with the lid.
- Place the jar in a warm place (between 26 °C and 30 °C) for about 24 hours. Sometimes, it takes shorter time for the sourdough starter to rise, if you see the signs from number 6. Then, you can proceed to Day 3.
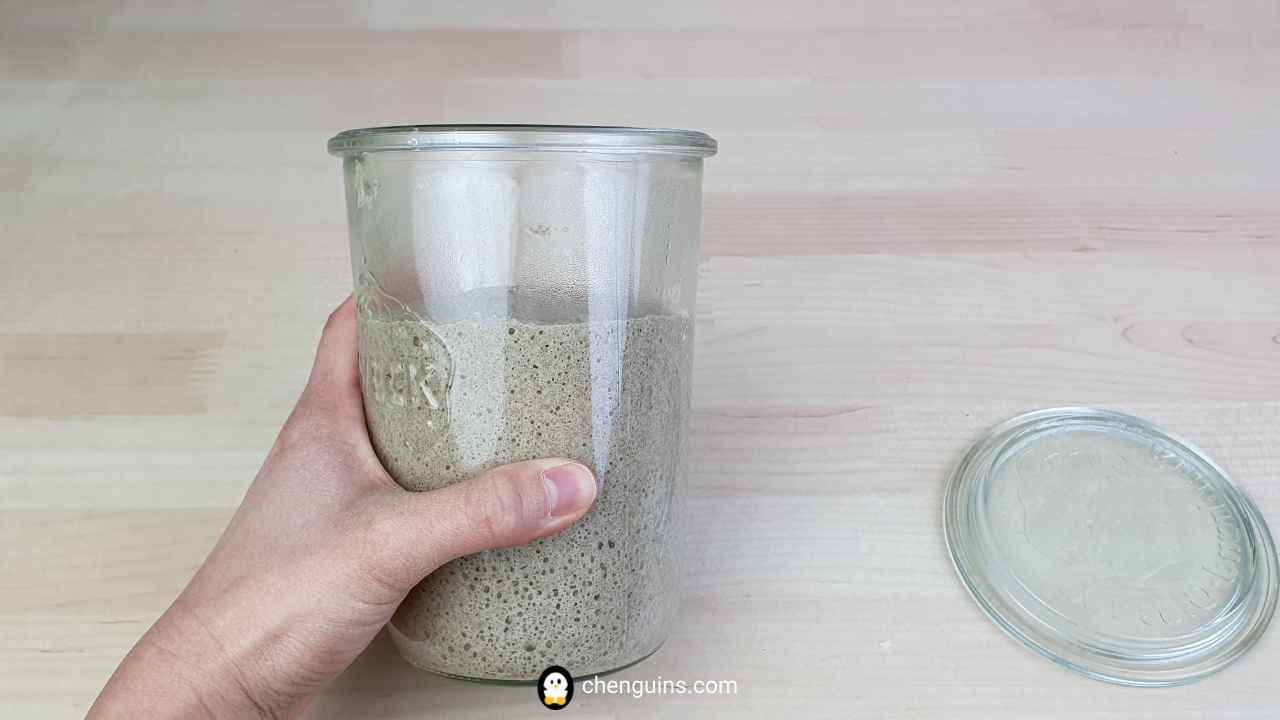
- The height of the sourdough starter should at least be doubled. In addition, there should be many little bubbles in the starter (larger than that from Day 1). The starter has risen to its maximum and when it has fallen slightly. Check the sides of the jar for sourdough streaks.
Day 3:
- In a small clean jar, add 50g of whole grain rye flour into 50g of warm water. Thereafter, add 25g of the sourdough starter from Day 2 into the jar. Discard the rest of the sourdough.
- Mix the ingredients with a clean spoon until you get a smooth texture.
- With the help of a second spoon, smoothen the top of the mixture until you get a flat surface. Mark the height of your mixture with a permanent marker.
- Gently place the lid on the jar, without screwing the lid. Simply cover the mixture with the lid.
- Place the jar in a warm place (between 26 °C and 30 °C) for about 10 to 24 hours. Sometimes, it takes shorter time for the sourdough starter to rise, if you see the signs from number 6. Then, you can proceed to Day 4.
- The height of the sourdough starter should at least be doubled. In addition, there should be many bubbles in the starter (larger than that from Day 2). The starter has risen to its maximum and it has fallen slightly. Check the sides of the jar for sourdough streaks. The sourdough starter should start to produce a mild, fruity, citrusy smell.
Day 4:
- In a small clean jar, add 50g of whole grain rye flour into 50g of warm water. Thereafter, add 25g of the sourdough starter from Day 3 into the jar. Discard the rest of the sourdough.
- Mix the ingredients with a clean spoon until you get a smooth texture.
- With the help of a second spoon, smoothen the top of the mixture until you get a flat surface. Mark the height of your mixture with a permanent marker.
- Gently place the lid on the jar, without screwing the lid. Simply cover the mixture with the lid.
- Place the jar in a warm place (between 26 °C and 30 °C) for about 6 to 12 hours. Sometimes, it takes shorter time for the sourdough starter to rise, if you see the signs from number 6. Then, you can proceed to Day 4.
- The height of the sourdough starter should at least be doubled. In addition, there should be many bubbles in the starter. The starter has risen to its maximum, and it has fallen slightly. Check the sides of the jar for sourdough streaks. The sourdough starter should start to produce a mild, fruity, citrus smell.
- Repeat the steps from Day 4 for another 2 to 3 times. Thereafter, keep the jar with the lid (loosely place on top of the jar) into the refrigerator. Feed your sourdough about once a week, or before you need to bake. A fresh sourdough starter is needed for baking, since old sourdough starter does not effectively rise bread dough.
How to feed your sourdough starter
- In a small clean jar, add 50g of whole grain rye flour into 50g of warm water. Thereafter, add 10g of the sourdough starter into the jar. Do not throw away the rest of the old sourdough starter until the new sourdough starter has grown successfully. In case, the new sourdough starter did not work out, you can refresh the old sourdough starter again.
- Mix the ingredients with a clean spoon until you get a smooth texture.
- With the help of a second spoon, smoothen the top of the mixture until you get a flat surface. Mark the height of your mixture with a permanent marker.
- Gently place the lid on the jar, without screwing the lid. Simply cover the mixture with the lid.
- Place the jar in a warm place (between 21 °C and 26 °C) for about 6 to 12 hours. Sometimes, it takes shorter time for the sourdough starter to rise, if you see the signs from number 6.
- The height of the sourdough starter should at least be doubled. In addition, there should be many bubbles in the starter. The starter has risen to its maximum and fallen slightly. Check the sides of the jar for sourdough streaks. The sourdough starter should start to produce a mild fruity and citrusy smell.
- Immediately, keep the jar with the lid (loosely place on top of the jar) into the refrigerator. Feed your sourdough about once a week. You can either discard the old sourdough or make the best out of it (such as for cooking or for baking). Once the starter is stable enough, you can use “normal” flour. There is no need to use whole grain flour.
How do you know when the sourdough starter is ready

An active sourdough starter should be bubbly and double in height, when it is ready. It should have a mild fruity and citrusy smell. As your starter ages, the smell of it intensifies as well. Once you try it out, you will understand what I mean.
If it does not smell right or too intense, then it is probably time for refreshment (you will need to feed it). Also, it should not contain bad bacteria and turn moldy.
How to store a sourdough starter

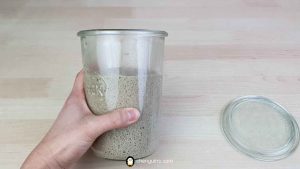
Once the sourdough starter has grown (and you probably have given it a name), you can keep it in the refrigerator to slow down the fermentation. We are going to “retard” its fermentation. Once they have reached the peak and fall slightly (see photo), store them. Since I bake each week, I feed my starters once a week as well.
After feeding my starters, I do not throw my old sourdough starters away immediately. We need a plan B, in case the feeding is not successful. You can try it again. Once it is successful,
I usually discard them or cook with it. I prefer making a small portion, so that I do not have much to discard, since the old sourdough starters do not work much for rising.
If you need to go on a long holiday (about 3 weeks), you can either bring your starter with you or refresh it before you go. Reduce the amount of the water to half and keep it in the refrigerator between 2°C and 5°C. Feed them as soon as possible.
If you have read the entire guide, tell me in the comment section below! I hope that this “how to make sourdough starter from scratch” guide is not overwhelming yet comprehensive for beginners.
This guide is not everything and contains only the basics of the sourdough world. However, it is more than enough for you to start growing your very own sourdough starter. It is really not as difficult as you think, just relax, have fun and experiment all sorts of baked goods. If you treat your sourdough starter well, it will stay loyal and pay you back with the best breads, you have ever tasted.
Have you tried growing your starter? What was your experience? Show me and tag me #chenguins on social media, so that I can see your recreation as well.
Until next time & guten Appetit!
Greetings from the Black Forest,
Pia
Watch how to make this recipe
Print this recipe
How to make sourdough starter from scratch
Equipment
- Kitchen scale
- 2-3 Glass jars with lids heat-resistant, canning jars, 500g (small), 750g (Large)
- 2-3 Spoons Long-enough for the jars
- 1-2 Bowls
- 1 Permanent marker
Ingredients you need
From Day 1 to Day 4
- 50 g Warm water ~ 40 °C
- 50 g Organic whole grain rye flour Any other high-quality whole grain/ whole wheat flour of your choice
- Sourdough Starter Not on day 1
- Boiling water To sterilise all utensils
Feeding your sourdough starter
- 50 g Warm water ~ 40 °C
- 50 g Rye Flour The same type of flour you used
- 10 g Active sourdough starter
- Boiling water To sterilise all utensils
Directions
Day 1
- In a small clean jar, add 50g of organic whole grain rye flour into 50g of warm water.
- Mix the ingredients with a clean spoon until you get a smooth texture.
- With the help of a second spoon, smoothen the top of the mixture until you get a flat surface. Mark the height of your mixture with a permanent marker.

- Gently place the lid on the jar, without screwing the lid. Simply cover the mixture with the lid.
- Place the jar in a warm place (between 26 °C and 30 °C) for 24 hours. It is a good sign, if you start seeing tiny bubbles in the starter.
- The height of the sourdough starter should double. In addition, there should be many tiny little bubbles in the starter.

Day 2
- In a large clean jar, add 50g of whole grain rye flour into 50g of warm water. Thereafter, add all the sourdough starter from Day 1 into the large jar.
- Mix the ingredients with a clean spoon until you get a smooth texture.
- With the help of a second spoon, smoothen the top of the mixture until you get a flat surface. Mark the height of your mixture with a permanent marker.
- Gently place the lid on the jar, without screwing the lid. Simply cover the mixture with the lid.
- Place the jar in a warm place (between 26 °C and 30 °C) for about 24 hours. Sometimes, it takes shorter time for the sourdough starter to rise, if you see the signs from the next step. Then, you can proceed to Day 3.
- The height of the sourdough starter should at least be doubled. In addition, there should be many little bubbles in the starter (larger than that from Day 1). The starter has risen to its maximum and it has fallen slightly. Check the sides of the jar for sourdough streaks.

Day 3
- In a small clean jar, add 50g of whole grain rye flour into 50g of warm water. Thereafter, add 25g of the sourdough starter from Day 2 into the jar. Discard the rest of the sourdough.
- Mix the ingredients with a clean spoon until you get a smooth texture.
- With the help of a second spoon, smoothen the top of the mixture until you get a flat surface. Mark the height of your mixture with a permanent marker.
- Gently place the lid on the jar, without screwing the lid. Simply cover the mixture with the lid.
- Place the jar in a warm place (between 26 °C and 30 °C) for about 10 to 24 hours. Sometimes, it takes shorter time for the sourdough starter to rise, if you see the signs from the next step. Then, you can proceed to Day 4.
- The height of the sourdough starter should at least be doubled. In addition, there should be many bubbles in the starter (larger than that from Day 2). The starter has risen to its maximum, and it has fallen slightly. Check the sides of the jar for sourdough streaks. The sourdough starter should start to produce a mild, fruity, citrusy smell.
Day 4
- In a small clean jar, add 50g of whole grain rye flour into 50g of warm water. Thereafter, add 25g of the sourdough starter from Day 3 into the jar. Discard the rest of the sourdough.
- Mix the ingredients with a clean spoon until you get a smooth texture.
- With the help of a second spoon, smoothen the top of the mixture until you get a flat surface. Mark the height of your mixture with a permanent marker.
- Gently place the lid on the jar, without screwing the lid. Simply cover the mixture with the lid.
- Place the jar in a warm place (between 26 °C and 30 °C) for about 6 to 12 hours. Sometimes, it takes shorter time for the sourdough starter to rise, if you see the signs from the next step. Then, you can proceed to Day 4.
- The height of the sourdough starter should at least be doubled. In addition, there should be many bubbles in the starter. The starter has risen to its maximum and fallen slightly. Check the sides of the jar for sourdough streaks. The sourdough starter should start to produce a mild, fruity, citrus smell.
- Repeat the steps from Day 4 for another 2 to 3 times. Thereafter, keep the jar with the lid (loosely place on top of the jar) into the refrigerator. Feed your sourdough about once a week or when you need to bake. A fresh sourdough starter is needed for baking, since old sourdough starter does not effectively rise bread dough.
Feeding your sourdough starter
- In a small clean jar, add 50g of whole grain rye flour into 50g of warm water. Thereafter, add 10g of the sourdough starter into the jar. Do not throw away the rest of the old sourdough starter until the new sourdough starter has grown successfully. In case, the new sourdough starter did not work out, you can refresh the old sourdough starter again.
- Mix the ingredients with a clean spoon until you get a smooth texture.
- With the help of a second spoon, smoothen the top of the mixture until you get a flat surface. Mark the height of your mixture with a permanent marker.
- Gently place the lid on the jar, without screwing the lid. Simply cover the mixture with the lid.
- Place the jar in a warm place (between 21 °C and 26 °C) for about 6 to 12 hours. Sometimes, it takes shorter time for the sourdough starter to rise, if you see the signs from the next step.
- The height of the sourdough starter should at least be doubled. In addition, there should be many bubbles in the starter. The starter has risen to its maximum and fallen a little. Check the sides of the jar for sourdough streaks. The sourdough starter should start to produce a fruity and citrusy smell. As your starter ages, the smell of it intensifies as well.
- Immediately, keep the jar with the lid (loosely place on top of the jar) into the refrigerator. Feed your sourdough about once a week. You can either discard the old sourdough or make the best out of it.
Pin for later


0 Comments