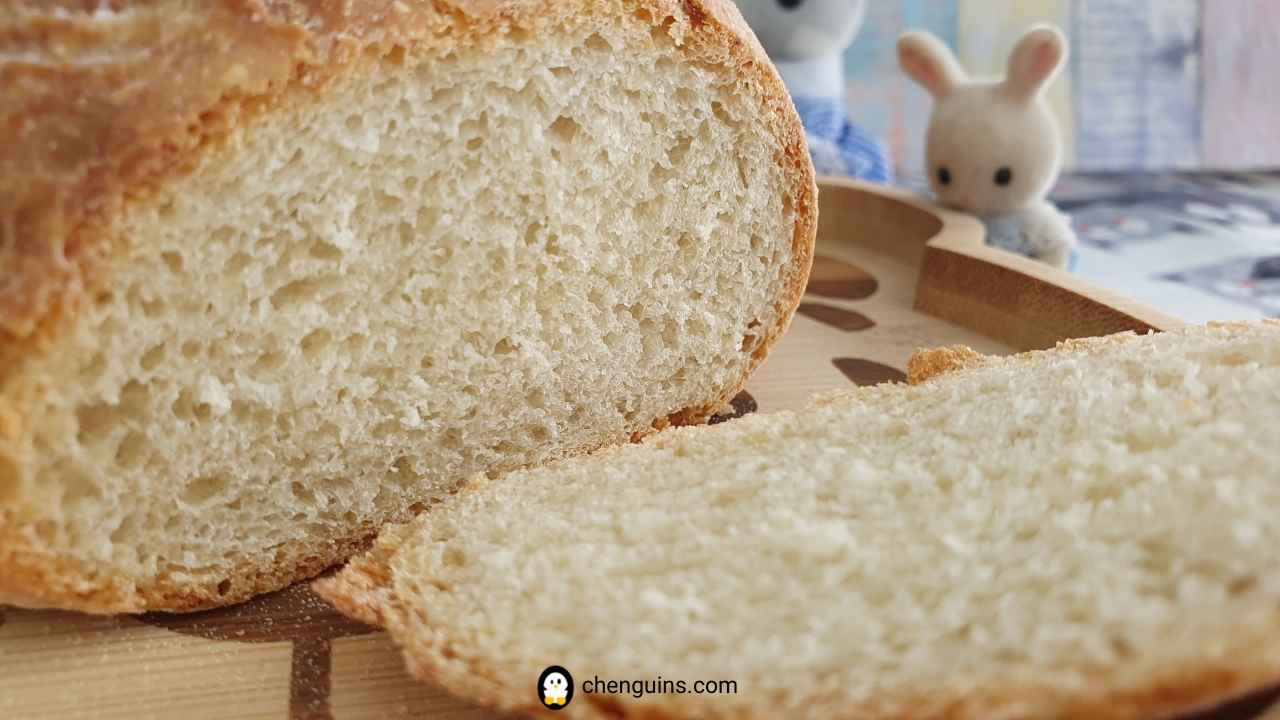
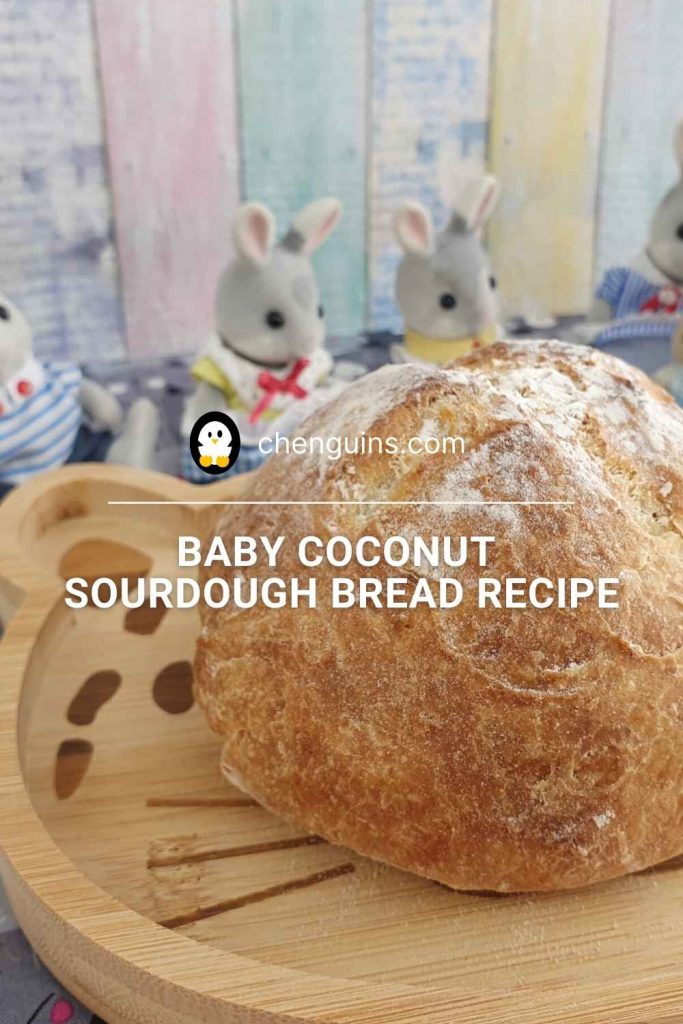
Baby coconut bread (Sourdough recipe) – This simple and aromatic baby sourdough is perfect to be eaten on its own or with a homemade fruit jam. A mild coconut flavour pairs with a tangy sourdough taste, your children will love this recipe.
This baby coconut bread smells so so so good! A mild coconut flavour pairs with a tangy sourdough taste, your children will love this recipe. Not only that, coconut is full of health benefits such as zinc and iron.
This recipe brings back a lot of childhood memories. I don’t mean baking because no one baked at home when I was younger. I mean the coconut aroma.
When I was a child, every time my grandma needed fresh coconut milk for her signature chicken curry sauce, she would just go to the street and ordered some grated coconut. This man on the street had this large machine to shred coconuts. It was fascinating to watch as a child. Thereafter, my grandma would squeeze out the coconut milk with her bare hands.
In the Black Forest, it is difficult to find fresh coconuts. Thankfully, I can still buy canned coconut milk and grated coconut in the grocery stores. I definitely miss all these delicious tropical fruits.
Just a little disclaimer, I am not a nutritionist or physician. I am just a simple mum of 2 kids. You know your kids the best. If you think that your baby is ready for solids and has no allergies, you can try this recipe. If you are unsure, please consult your doctor. I personally introduce breads to my baby, when he was about 8 to 10 months, even though he was ready for solids at an earlier age. My kids have had no problems, and they love sourdough breads.
Tips on making Baby Coconut Bread
Coconut milk: Other than its health benefits, coconut milk adds a creamy and coconut flavour to your baby sourdough. Fresh coconut milk will always be a better choice. However, I do not have access to fresh coconut milk. In this case, I will opt for canned coconut milk, which works fine as well. Most importantly, you need to warm up your liquid to about 40 °C for the bread dough.
Milk: Since we want a mild-flavoured coconut bread (so that we can eat it with our homemade jam), using milk makes up the other part of the liquid needed in this recipe. The result is a soft and fluffy bread. Instead of milk, water is a good alternative.
Grated coconut: Grated coconut adds a nice texture and aroma to the bread.
Salt: Salt is optional for toddlers. However, it should be skipped for infants (i.e. kids under 12 months).
All-purpose flour: I chose all-purpose flour in this recipe because I wanted a fun and fluffy bread. For whole grain sourdough, then check out this whole wheat sourdough or whole grain spelt sourdough recipe.
Sourdough starter: Sourdough is a leavening agent in this case, and it takes longer to rise than other types of breads. If you are short of time, then this recipe is not for you. Instead, check out this post.
There are several factors affecting speed of your bread rising:
- Temperature is crucial: The warmer, the better and faster (about 21°C to 26°C) it is for the coconut bread to rise. Depending on the temperature of the environment, it takes about 8 to 24 hours for your bread to rise. However, size comes before time. Just observe the size of the dough. If it does not rise within a certain amount of time, simply give it a few more hours or change an environment.
- Amount of sourdough: The more sourdough starter you use in your dough, the faster the bread would rise. However, it also means that the tangy flavour would be stronger in the end product.
- Age of the active sourdough: A young active sourdough starter tends to be less efficient than mature sourdough starter. Your coconut bread might not rise as much as or as fast as you wish. The sourdough starter will mature eventually.
How to make Baby Coconut Bread
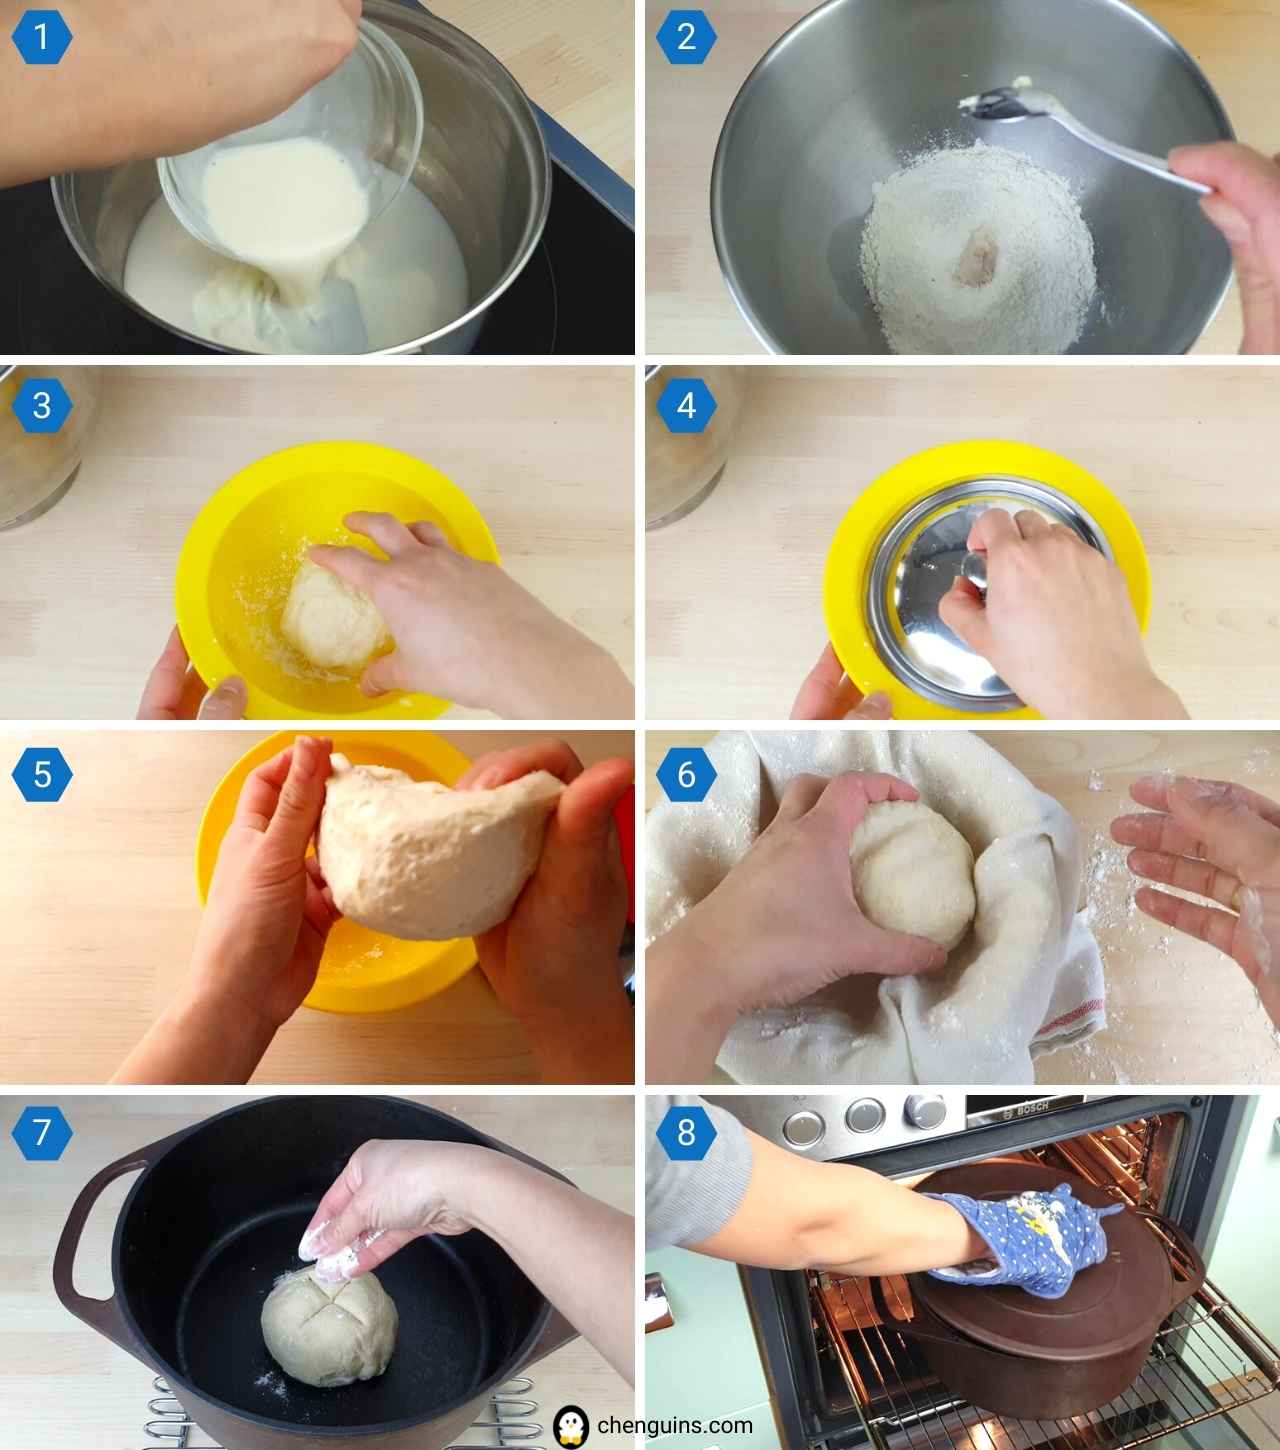
- Mix coconut milk and milk in a pot. Over a stove, warm up (not boiling) the liquid mixture to about 40 °C.
- In a small bowl, add in all the ingredients according to the list. Mix the ingredients either using hands or an electric mixer until a dough is form. If you are using an electric mixer, mix the ingredients at the lowest level for about 3-5 minutes until you get a dough.
- Spread some all-purpose flour in a separate bowl and transfer the dough into the bowl. If the dough is sticky, simply spread some flour on your hands.
- Cover the bowl with a suitable cutting board or a plastic to prevent the dough from drying. Thereafter, keep the bowl in a warm place (about 21 °C – 26 °C). The sourdough will work faster in a warmer place.
- After 2 – 8 hours, check if the bread dough has increase in size (double in size is not required). Once it has increased in size, stretch and fold all sides of the dough with your hands. If the dough gets too sticky, spread very little all-purpose flour to ease the folding.
- After which, cover the coconut bread dough again and repeat step 3. Once the sourdough bread rises for the second time (it should at least double in size) after about 2 – 8 hours, repeat step 4 and 3 once more.
- When the dough rises for the third time after 2 – 6 hours, spread a little flour onto your working space and transfer your sourdough bread from the bowl to your working top using a dough scraper.
- Do not knead the dough so that we can retain the air in the bread, simply form the dough into a round shape. If the bread dough gets too sticky, moist your hands or spread a little flour onto your hands.
- Place a kitchen towel in another small bowl and distribute a little flour all over the towel to prevent the dough from sticking to the towel. Transfer the dough into the bowl. For one last time, repeat step 3 for another 1 – 2 hours.
- Preheat baking oven and cast iron pot with a lid to 250 °C. Once the oven is hot enough, take the pot out. Be careful, it is extremely hot! If you do not own a cast iron pot with a lid, then please refer to this post for an alternative baking method (from step 9 onwards).
- Remove the cover of the pot and transfer the bread dough into your pot. Use a knife to score the surface of the bread and spread a little flour over the surface of the bread for a rustic look.
- Cover the pot with a lid (be careful, it is very hot!) and place everything into the preheated oven. Lower the heat to 230 °C and bake for about 15 minutes.
- After 18 minutes, remove the lid of the cast iron pot and continue baking the baby coconut bread for about 7 minutes or until the bread turn brown/ crispy. It depends on your baking oven, you might need to adjust the baking time accordingly. Just have fun and try it out.
- After baking, remove the sourdough bread from the pot and place it on a cooling tray until it is completely cool down. Thereafter, you can store it in a cloth bag. Serve this sourdough plain or with some homemade baby fruit jam for breakfast. Finish it within 3-4 days.
How to serve Baby Coconut Bread
This baby coconut bread tastes amazing on its own. My younger son loves it plain or serve it with his favourite healthy homemade fruit jam. This homemade jam is without added refined sugar, and it is perfect for kids and adults. As mentioned, you know your child the best, so serve it the way you love to.
How to store Baby Coconut Bread
This coconut sourdough bread can be kept for 3 to 4 days in a cloth bag and in a dry place. Please finish this bread as soon as possible because it will dry out eventually. You can freeze this coconut bread for several months.
Since I bake two times a week, instead of discarding my sourdough starter, I love to experiment with different types of baby sourdough.
Adventures in a dino park (Lego stop motion)… Watch the video below to find out what happened! I hope you enjoy the recipe as much as my family does. Show me and tag me #chenguins on social media, so that I can see your recreation as well. How does your baby like this recipe? Tell me in the comment section below!
Until next time & guten Appetit!
Greetings from the Black Forest,
Pia
Watch how to make this recipe
Print this recipe
Baby Coconut Bread Recipe
Ingredients you need
- 55 g Coconut milk (~ 40 °C)
- 40 g Milk/ Water (~ 40 °C)
- 137 g All-purpose flour
- 10 g Grated coconut
- 1 pinch of Salt not for kids under 12 months
- 5 g Sourdough Starter active and bubbly
Directions
- Mix coconut milk and milk in a pot. Over a stove, warm up the liquid mixture to about 40 °C.
- In a small bowl, add in all the ingredients according to the list. Mix the ingredients either using hands or an electric mixer until a dough is form. If you are using an electric mixer, mix the ingredients at the lowest level for about 3-5 minutes until you get a dough.
- Spread some all-purpose flour in a separate bowl and transfer the dough into the bowl. If the dough is sticky, simply spread some flour on your hands.
- Cover the bowl with a suitable cutting board or a plastic to prevent the dough from drying. Thereafter, keep the bowl in a warm place (about 21 °C - 26 °C). The sourdough will work faster in a warmer place.
- After 2 - 8 hours, check if the bread dough has increase in size (it does not have to be double). Once it has increased in size, stretch and fold all sides of the dough with your hands. If the dough gets too sticky, spread very little all-purpose flour to ease the folding.
- After which, cover the coconut bread dough again and repeat step 3. Once the sourdough bread rises for the second time after about 2 - 8 hours, repeat step 4 and 3 once more.
- When the dough rises for the third time after 2 - 6 hours, spread a little flour onto your working space and transfer your sourdough bread from the bowl to your working top using a dough scraper.
- Do not knead the dough so that we can retain the air in the bread, simply form the dough into a round shape. If the bread dough gets too sticky, spread a little flour onto your hands.
- Place a kitchen towel in another small bowl and distribute a little flour all over the towel to prevent the dough from sticking to the towel. For one last time, repeat step 3 for another 1 - 2 hours.
- Preheat baking oven and cast iron pot with a lid to 250 °C. Once the oven is hot enough, take the pot out. Be careful, it is extremely hot! If you do not own a cast iron pot with a lid, then please refer to this post for an alternative baking method (from step 9 onwards).
- Remove the cover of the pot and transfer the bread dough into your pot. Use a knife to score the surface of the bread and spread a little flour over the surface of the bread for a rustic look.
- Cover the pot with a lid (be careful, it is very hot!) and place everything into the preheated oven. Lower the heat to 230 °C and bake for about 15 minutes.
- After 18 minutes, remove the lid of the cast iron pot and continue baking the baby coconut bread for about 7 minutes or until the bread turn brown/ crispy. It depends on your baking oven, you might need to adjust the baking time accordingly. Just have fun and try it out.
- After baking, remove the sourdough bread from the pot and place it on a cooling tray until it is completely cool down. Thereafter, you can store it in a cloth bag. Serve this sourdough plain or with some homemade baby fruit jam for breakfast. Finish it within 3-4 days.
Pin for later


0 Comments